

You've chosen the venue, approved the flowers, and arranged the table plan. Then the room looks polished but flat in photographs, or the dinner table needs warmth without another complicated centerpiece. Floating candles decorations solve that visual problem quickly, but the success of the display depends on more than placing candles in water. Vessel shape, water depth, spacing, drafts, burn duration, and nearby décor all affect the result.
The most reliable approach combines an elegant visual idea with disciplined setup. A well-prepared bowl can look effortless, while a crowded vessel, unsuitable glass, or loose petals near a flame can create avoidable damage. The following setups are designed for homes, weddings, restaurants, spas, and hospitality spaces where appearance and safe operation have to work together.
Table of Contents
- Why Floating Candles Transform Any Space
- Choosing the Right Container and Water Setup
- Three Stunning Setup Styles for Every Occasion
- Safety Rules and Maintenance Tips You Cannot Ignore
- Creative Variations with Candle Sand and Natural Elements
- Your Next Steps for Stunning Floating Candle Displays
Why Floating Candles Transform Any Space
A few minutes before guests arrive, the table may be fully set yet still lack a focal point. A wide glass bowl, clean water, and several white floating candles can solve that quickly. The flames move across the surface, and their reflections give the centerpiece more depth than a candle placed on a flat tray.
That visual effect also works in very different rooms. Floating candles can soften a bathroom, frame a wedding table, add quiet warmth to a spa-style setting, or give a restaurant an understated evening glow. Their usefulness comes from the relationship between the candle and the water, not from flame alone.
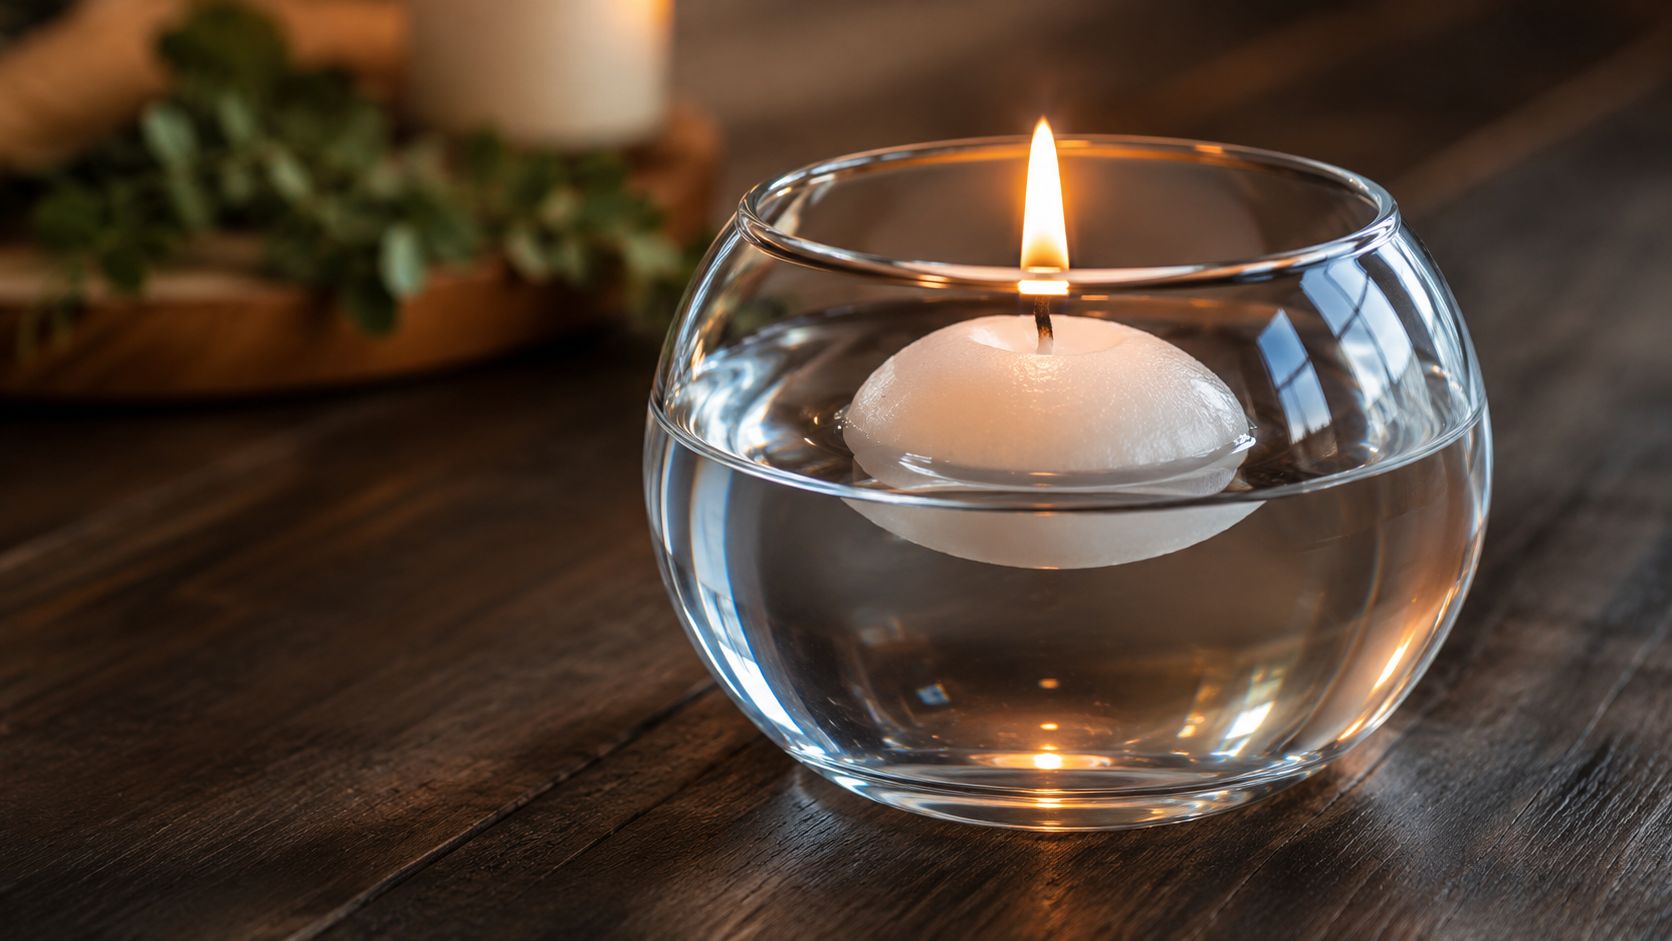
A true floating candle has a wide base and flat top, so it rests on the surface instead of behaving like a pillar candle. A container candle keeps its wax inside a vessel, while a floating candle leaves the water visible around the flame. That open surface becomes part of the design and helps the display feel lighter.
A modern decorative format
Floating candles are often treated as an old ritual object, but their recognizable commercial form is relatively recent. One candle-history account places commercial invention around the 1980s, while broader candle history describes growing consumer interest in decorative and aromatic candles during the mid-1980s. Floating candles developed alongside that shift, as candles became tools for atmosphere and interior styling as well as illumination. The history and design of floating candles
The technical idea predates that commercial growth. A U.S. patent titled “Floating candle” was filed on December 9, 1939 and issued on March 11, 1941. The later décor format gained traction as homes, event spaces, and hospitality interiors placed more value on decorative light.
Why the water matters
Water reflects the flame, reduces the visual heaviness of the vessel, and introduces depth without tall flowers or elaborate construction. That makes the format useful for tables where guests need a clear sightline and for photographs that benefit from movement and reflected light. For an accessible explanation of what floating candles are and how they work, start with the candle's shape and buoyancy rather than its appearance alone.
The arrangement can change without losing its basic composition. Switch the vessel, add a restrained natural element, or choose a stronger wax color. Keep the operating limits in view: the candle must be designed to float, and the water must remain stable enough to support it throughout the burn.
Ordinary tealights, pillars, or decorative objects can tip or sink because their density and balance are wrong. That mistake may look minor during setup, but it can move the flame toward the vessel edge or nearby décor. A successful display therefore begins with a suitable floating candle, then builds the visual styling around it.
Choosing the Right Container and Water Setup
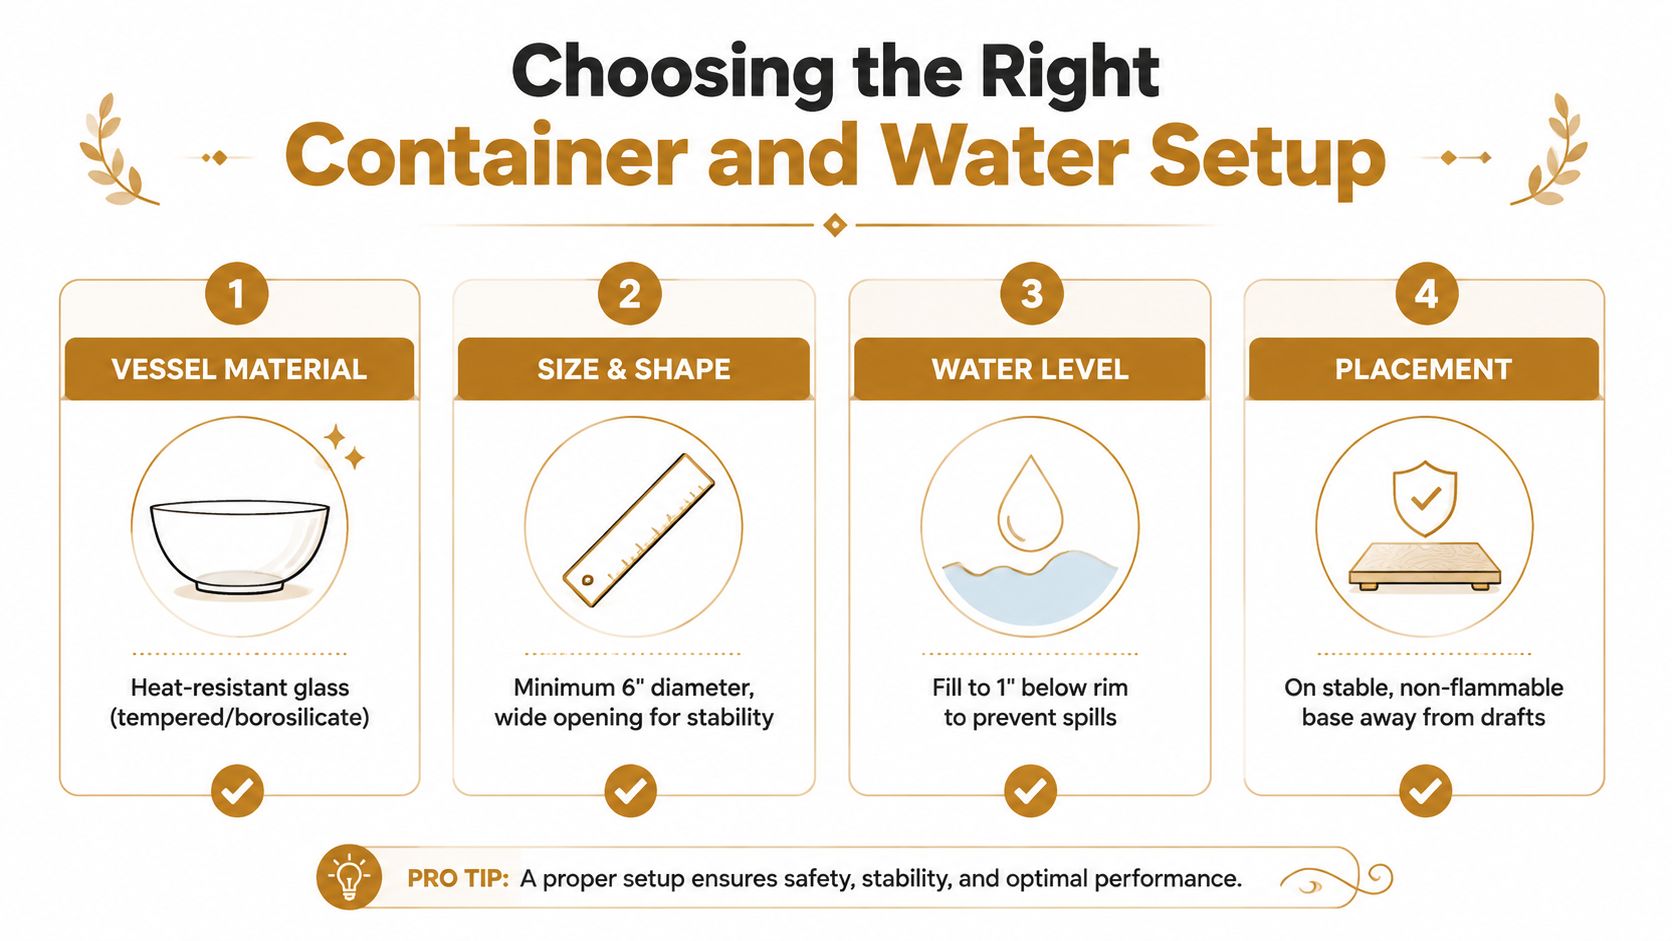
Container selection determines whether a floating display looks controlled or improvised. Start with a wide, heat-resistant vessel, not a narrow vase. A practical benchmark is a bowl at least 6 inches in diameter and 3 inches deep, filled with distilled water to within 1/2 inch of the rim. These measurements provide enough surface area for stability while leaving room to manage movement and splashing. Floating centerpiece safety guidance
Tempered glass and borosilicate glass are preferable because ordinary glass can respond poorly to concentrated heat. The vessel should sit on a level, stable, non-flammable surface. Add non-slip pads beneath it, especially on polished wood, stone, or a rented table where a small shift could send a candle toward the wall.
Match the vessel to the candle
A suitable floating candle is commonly 1.5 to 2 inches in diameter and made from high-melt-point wax rated at at least 145°F, according to the operational guidance linked above. The broad shape spreads weight across the water and reduces the chance of the candle rolling or leaning. Leave visible water around each candle rather than packing the surface with wax.
Overcrowding creates several problems at once. Heat accumulates, the water becomes harder to monitor, flames can extinguish one another, and a drifting candle may reach the glass wall. Independent rental guidance also recommends keeping the water line at least 1/2 inch below the top of the glass, because contact between a hot, drifting candle and the rim can contribute to cracking. Event-rental guidance for floating candle arrangements
Prepare the water deliberately
Distilled water gives the cleanest finish because it reduces visible mineral deposits on transparent glass. Fill the vessel slowly, stopping below the rim rather than correcting an overfilled bowl after candles and décor are already inside. If the display will remain in service, check the water line before lighting and after guests begin moving around the room.
A transparent vessel such as the Luxury candle glass 300 ml /3.54×3.14in can work for candle projects and decorative use, with thick, heat-resistant glass described in its product information. It isn't a replacement for a broad centerpiece bowl, so use it when the scale and candle format suit the vessel.
For a fuller discussion of proportions and styles, use this guide to bowls for floating candles. Before an event, test the exact bowl, water level, candle size, and placement together. A dry run catches instability before guests, linens, and valuable décor are involved.
Three Stunning Setup Styles for Every Occasion
The strongest arrangement depends on the event, not on a single universal recipe. A romantic wedding centerpiece needs controlled elegance, while a relaxed dinner can tolerate asymmetry and texture. Outdoor displays require a different level of protection because wind changes the flame behavior and can move lightweight elements.
The romantic wedding bowl
For a wedding or formal reception, use a crystal or heat-resistant glass bowl, distilled water, white floating candles, and a restrained amount of rose petals. The petals should remain away from the wick and shouldn't form a dense layer beneath the flame. The finished look is classic because the white wax and red or blush petals create contrast without competing with the flowers on the table.
Set the bowl on a low, stable base so it remains visible without obstructing conversation. This style works especially well on round guest tables, sweetheart tables, welcome tables, and sheltered ceremony areas. Assembly is straightforward once the water and materials are prepared, but allow time to remove damaged petals and reposition any candle that drifts toward the edge.
The trade-off is maintenance. Petals can become waterlogged, shift into the flame path, or cling to the glass, so a coordinator should inspect the arrangement during service. If the venue has strict real-flame rules, confirm approval before building the design.
The relaxed dinner tray
A casual dinner arrangement benefits from warmth rather than symmetry. Use a rustic wooden tray as the visual frame, a broad heat-resistant bowl, floating candles in a muted color, and small sprigs of greenery placed around the vessel rather than in the water. Keep the greenery outside the flame zone, and choose a tray large enough to catch minor drips without crowding the bowl.
This setup suits a home dining room, private supper, restaurant table, or informal celebration. The wood adds texture, while the water keeps the composition lighter than a solid candle cluster. Colored candles can echo napkins, ceramics, or seasonal produce, but too many shades make the arrangement look busy.
The tray also makes service easier. Staff or hosts can lift the entire centerpiece when the table needs clearing, provided the bowl is cool, stable, and not filled to the point of splashing.
The sheltered outdoor lantern
For patios and garden entertaining, use a weather-resistant container, a stable sand base around the outside of the water vessel, and candles formulated with citronella if insect deterrence is part of the intended experience. The sand should support the container externally, not replace the water required for a true floating candle. Place the setup in a sheltered position where wind can't push the flame sideways or drive the candle into the glass.
This style works for outdoor dining, entry paths, and lounge areas, but it has the highest operational risk of the three. Wind can extinguish flames, move loose petals, and disturb lightweight containers. A lantern or protective enclosure can help, but it must still allow adequate ventilation and shouldn't trap excessive heat around the glass.
Design decision: Choose the wedding bowl for polish, the dinner tray for flexibility, and the outdoor lantern only when you can control wind and supervise the display.
Safety Rules and Maintenance Tips You Cannot Ignore
A floating candle setup is safer when the water, vessel, and spacing are treated as part of the equipment. It isn't enough to see a flame surrounded by water and assume the arrangement is low risk. Heat can stress glass, drafts can destabilize flames, and decorative materials can turn a carefully styled bowl into a fire hazard.
Keep every candle at least 30 cm from anything that can catch fire and at least 50 cm below an overhead surface, including fabric, foliage, shelves, and hanging decorations. Suitable bowls should be filled with water and kept away from flammable décor. Candle safety guidance for placement and surrounding materials
Control the burn session
Keep each session to a maximum of 2 hours. Event-safety guidance reports that flame height can increase after about 90 minutes as the wick carbonizes, raising radiant output by up to 35%. That change can increase heat exposure to the vessel and nearby materials, so a long event should use planned replacement rather than leaving the same candle burning continuously. Operational burn-time guidance
Assign someone to monitor the installation. They should watch for candle drift, rising flame height, smoke, leaning wax, water loss, and cracks or fine lines in the glass. If the vessel becomes unusually hot, the flame behaves erratically, or the candle reaches the wall, extinguish it and remove the setup once safe to handle.
Treat glass and drafts as active risks
Thermal stress can crack unsuitable glass, especially when concentrated heat meets a cool or damaged surface. Inspect every bowl before use, reject anything chipped or scratched, and never place a hot vessel directly onto a cold, wet, or unstable surface. Non-slip pads help prevent movement, but they won't correct a vessel that isn't rated for heat.
Drafts are equally disruptive. Air-conditioning outlets, open doors, fans, and outdoor breezes can bend the flame, push a floating candle across the water, or cause repeated extinguishing. Arrange the display in a sheltered location and test it under the venue's actual airflow conditions.
Maintain between uses
Trim the wick before the next session, replace dirty water, and remove wax fragments or plant material from the bowl. Store candles in a cool, dry place away from direct sunlight and pressure that could deform their bases. Extinguish with a snuffer or by carefully dipping the wick, rather than blowing across the water, which can create splashes and scatter light debris.
For larger installations, prepare spare candles, clean water, replacement vessels, and a written inspection routine. The display should be easy for staff to service without reaching across active flames.
Creative Variations with Candle Sand and Natural Elements
Water creates reflection and movement, but it isn't the only way to build depth. Candle sand adds a dry, granular layer that can support a separate flame vessel beside the floating arrangement. Used carefully, the two formats create contrast: water carries the floating light, while sand gives a grounded glow at a different height.
Candle pearls are made by spraying hot wax and cooling it into small, round granules. One supplier describes its material as 100% natural plant-based wax, produced without soy or paraffin, with a process intended to create consistent pearls rather than irregular particles. How pearled wax is manufactured Candle-sand products can also be scented or unscented, and fragrance may be incorporated during manufacturing rather than added after the wax has formed. Scented and unscented candle sand
Layer texture without competing flames
Place a small, heat-resistant sand candle in a separate vessel beside the water bowl. Don't pour granulated wax into the floating bowl, where it can interfere with the water surface, contaminate the vessel, or change how the floating candles move. Instead, use matching colors across both displays, such as ivory floating candles with pale sand wax, or a deep botanical shade paired with clear water and restrained greenery.
Fresh flowers, eucalyptus, herbs, citrus slices, shells, and decorative stones can all work as accents, but they must remain clear of the flame and mustn't prevent the candle from floating freely. A practical guide to flowers in floating candle centerpieces can help you judge scale and placement before adding organic material.
Choose the wax format for the job
Pearled wax is flexible because the vessel and wick influence the result. A product guide states that one pearled wax format is intended for vessels under 4 inches in diameter, with a designated wick size, and can burn for up to 12 hours with a 2.5-inch wick. Pearled wax container and wick guidance Treat that as a format-specific reference, not a universal promise. Match the wick and container rather than assuming every granule behaves identically.
For events, test color and scent in the actual room. A fragrance that feels subtle in a home may compete with food, flowers, or a spa treatment when repeated across many vessels. Use scented sand as a supporting note, and keep the floating candles unscented when the water centerpiece already carries strong floral or aromatic elements.
The Candledust offers plant-based candle sand in scented and unscented formats, plus reusable candle materials, ready-to-use pearled candles, glass candles, wicks, containers, and bulk options for event and hospitality use. Its process is designed to produce smooth, even pearls without lumps or uneven particles, a finish the brand calls the #Perfect pearl, and the brand describes itself as one of the first sand-wax candle producers and among the first to introduce scented sand candles, claims that remain unconfirmed by independent historical sources.
Your Next Steps for Stunning Floating Candle Displays
Start with one bowl, not a full venue. A single test arrangement reveals whether the candle floats evenly, whether the glass stays comfortable to handle, whether the water line looks right, and whether nearby décor remains safely separated. It also lets you judge the reflection in the room's real lighting instead of relying on a product photograph.
Use this first-time checklist:
- Select the vessel: Choose heat-resistant tempered or borosilicate glass with a broad opening and stable base.
- Prepare the water: Use distilled water and leave the required space below the rim.
- Space the candles: Keep them separated, away from the vessel wall, and free from petals or greenery that could touch the flame.
- Test the location: Check for drafts, overhead materials, table movement, and guest or staff traffic.
- Plan the session: Keep the burn within the safe operating limit and assign someone to monitor it.
- Scale carefully: Add vessels only after the first arrangement performs consistently.
Floating candles are forgiving from a design perspective. You can change the flower color, remove unnecessary elements, replace cloudy water, or shift from a formal bowl to a relaxed tray without rebuilding the whole concept. Once the basic water arrangement works, introduce candle sand in a separate heat-resistant vessel to add color, fragrance, and height without compromising the floating surface.
The Candledust offers smooth, plant-based candle pearls in scented and unscented formats, along with wicks, vessels, ready-to-use pearled candles, and bulk options for event and hospitality projects. Explore The Candledust to choose complementary wax colors and textures for your next floating candle display, then test the complete arrangement before scaling it for guests.