


You're standing at the sink with a candle that's been burning a little too long, and the wick's started to lean, darken, and spit a faint line of smoke into the room. The wax looks fine at first glance, but the glass has that gray ring nobody wants, and the flame is no longer behaving like it did at the start. That's usually the moment people ask how to trim candle wick, when the problem is already visible and the fix should've happened five minutes before lighting.
Table of Contents
- Why That Blackening Wick Matters More Than You Think
- The Quiet Science Behind a Clean Flame
- The Right Way to Trim a Candle Wick Step by Step
- How Wick Trimming Changes by Candle Type
- When Trimming Goes Wrong and How to Recover
- Trimming Wicks in Candle Sand the Easy Way
- Your Pre-Burn Wick Checklist
Why That Blackening Wick Matters More Than You Think
A wick that has turned black and curled over a melt pool is never just a cosmetic issue. It usually means the candle has drifted out of balance, and the signs show up fast, soot on the glass, a flame that looks sluggish or too tall, and wax that seems to vanish faster than it should. The candle may still be burning, but it is already giving you a clean warning that the burn is off.
The cost is practical, not abstract. Wick length directly changes how much melted wax gets pulled into the flame, so an untrimmed wick usually runs hotter and sootier, while an over-trimmed one can starve itself and go out or burn unevenly. A controlled wick gives you a controlled flame, which is why the habit has to stay consistent, check before every burn, not after the candle has already misbehaved. That rule appears across candle care guidance, including the common 1/8 to 1/4 inch range and the more familiar 1/4 inch everyday benchmark for cotton wicks, with trimming done only after the candle is completely cool and the wax is solid (Alibaba candle-care guidance, The Flaming Candle wick guide, Juneberry Place trimming instructions).
Practical rule: if the wick looks long enough to notice, it probably needed attention before the flame ever started.
That logic holds whether the candle sits in a jar, stands as a pillar, or lives in candle sand. The container changes the visibility, not the physics, and the wick is still the part that decides whether the burn stays neat or goes sideways.
The Quiet Science Behind a Clean Flame
A candle can look fine on the outside and still be feeding its flame badly. The wax is the fuel. The wick is the delivery system, a narrow channel that pulls melted wax upward so the flame can keep burning at a controlled rate. If that feed runs too fast, the flame overheats. If it runs too slow, the burn gets weak and uneven.
A wick that is too long pulls up more fuel than the flame can cleanly use. The result is usually a taller flame, more carbon, and the dark soot that settles on the vessel instead of staying in the burn. A wick that is too short creates the opposite problem, it cannot draw enough fuel, so the flame may struggle, tunnel, or go out when the melt pool starts to swallow it. Trimming is not about making the wick look neat. It resets the burn to a known starting point.
Why containers make this harder to judge
Jar candles make the problem harder to read because the wick sits below the rim and you are judging through glass, wax, and shadow at once. Sand candles create a different version of the same problem, because the wick sits in loose powder instead of solid wax. The eye keeps guessing wrong in both setups.
That is why appearance is a poor guide. A wick can look usable and still be too long, or it can look short enough and already be on the edge of failure. The cleaner habit is a repeatable trim before each burn, after the candle has cooled completely and the wax has set. Candle-care guidance consistently points to the same practical range for a controlled wick length, even when the exact measurement shifts a little by candle type (The Flaming Candle wick guide, CandleScience wick guidance).
A trim also gives you a chance to catch the warning signs before they turn into a mess. If the top is mushroomed, sooty, or bent off to one side, the wick is already telling you the next burn will be harder to manage. In practice, the flame is easiest to control when the wick starts each time from the same basic length and shape.
The Right Way to Trim a Candle Wick Step by Step
Let the candle cool completely before you touch the wick. Soft wax bends the wick, ruins a clean cut, and makes the next burn harder to control, especially in containers where the wick sits below the rim and is harder to judge by eye. Wait until the wax is fully solid and the candle feels room temperature.
Once the candle is cool, clear off any mushrooming, loose char, or debris at the tip. A wick trimmer is still the cleanest tool because it catches the clipped end, but sharp scissors or nail clippers work if that is what you have nearby. Keep the cutter level with the wax surface and make one clean cut. A sawing motion leaves the wick ragged and less stable on the next burn.
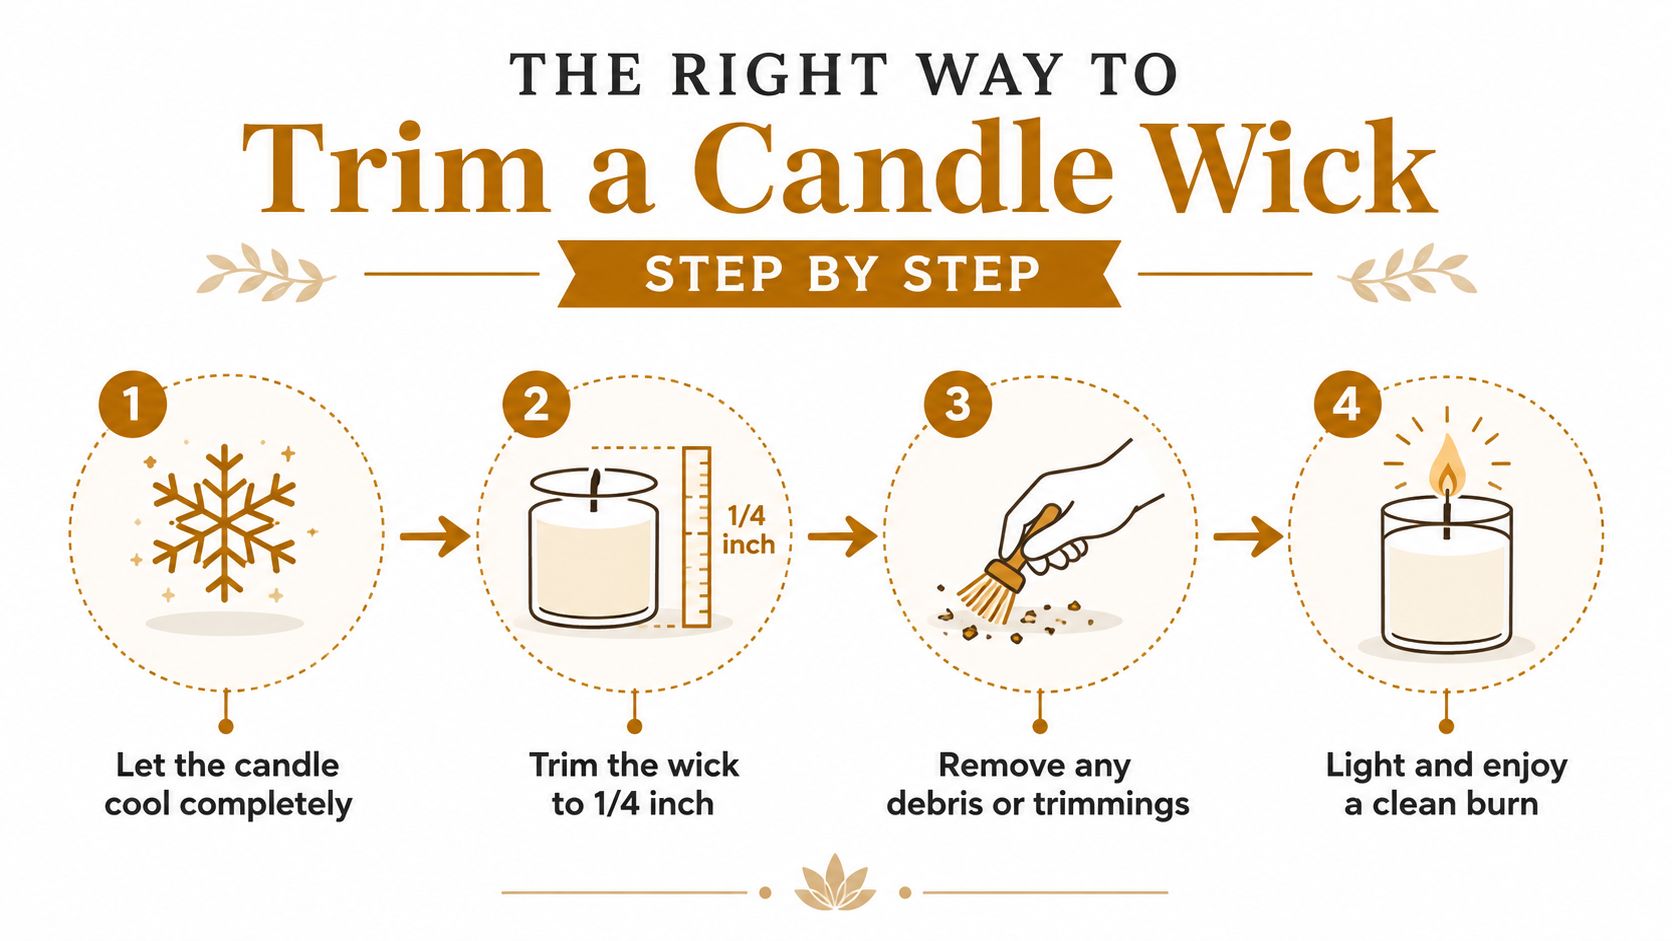
For most cotton jar candles, about 1/4 inch is the practical target. That said, the working range often sits around 1/8 to 1/4 inch depending on the candle and vessel, and the same general benchmark shows up across candle-care guides and trimming instructions (CandleScience wick guidance, The Candle Lab wick trimming guide). The point is consistency. Trim before every burn, not only when the wick starts to look messy.
Clean-up matters more than people admit
Remove the trimmings right away so they do not fall into the melt pool and drift around like little black scraps. Do not blow them across the room either, because a loose charred piece can land on fabric or skin. A clean candle burns cleaner, and the trim only does its job if the debris leaves with it. If you are trimming multiple-wick candles, give each wick its own cut and check the whole surface before relighting, since one wick can be healthy while another is already leaning or mushrooming (multiple-wick candles).
How Wick Trimming Changes by Candle Type
The universal “trim to 1/4 inch” advice is a good starting point, but it breaks down once candle geometry changes. Wood wicks, multi-wick containers, wide vessels, and sand candles all behave differently, and the cut has to follow the wick, not the slogan. The shape of the flame matters as much as the length.
Wood wicks need a shorter, lighter touch
For wood wicks, trim only the charred top and leave roughly 1/8 inch above the wax, with some technical demonstrations showing a light 45-degree angled cut so the flame can catch across the edge more evenly. That's the key difference, wood wicks don't want a big haircut, they want the burnt layer removed so the clean wood can light properly. Over-trimming is the common mistake, because it can make ignition difficult, while under-trimming tends to create more carbon and smoke (wood wick demonstration).
Multi-wick and wide candles need individual judgment
In double- or triple-wick containers, each wick should be trimmed on its own. Symmetry is not the rule, burn behavior is. The wick near a warmer side of the vessel may sit differently from the cooler side, and one wick can be healthy while another is mushrooming or leaning.
Do not trim the whole candle as if it were one unit. Trim each wick to its own controlled length, then inspect the whole melt pattern before relighting.
That same logic is why a one-size-fits-all answer misses the point in wide vessels and uneven pools. One wick can be technically “right” and still need a slightly different finish from the others if the burn pattern has shifted.
Sand candles change the timing, not the principle
In a sand candle, the wick sits in loose powder rather than solid wax, so the candle returns to room temperature quickly and the reset is faster. The basic rule still applies, the wick needs to be straight, clean, and short enough to burn predictably, but the handling is easier because there's no hard wax to cut through. That's one reason the Candledust multi-wick guide fits naturally with the broader care idea, each wick is treated as its own working part, not as a decorative afterthought.
When Trimming Goes Wrong and How to Recover
The hard part isn't trimming. It's recovering when the wick is already wrong. Most guides stop after the clean cut, but real candle use includes over-trimmed wicks, drowned wicks, tunneling, and soot that's already on the glass.
Too short is fixable, but don't panic
If the wick is trimmed so short that it won't stay lit, use a hair dryer or heat gun on low to melt a small ring of wax around the wick so the flame can catch again. The goal is to expose enough wick to re-establish a stable flame, not to flood the candle. That same failure mode is why trimming too short is such a bad habit in the first place, the wick can drown, or the flame can go out before it builds a proper melt pool (Harlem Candle Co. recovery guide).
Drowned or tunneling candles need different fixes
If the wick has sunk into a deep melt pool, extinguish the candle, let it cool, then remove a little of the cooled wax around the wick before relighting. If the candle is tunneling, the problem isn't that the wick needs yet another trim, it's that the burn memory is wrong. The practical recovery is a longer, more complete burn, though you should still trim the wick before that recovery burn so the flame has enough strength to melt the wax wall. A dedicated tunneling fix guide covers that recovery pattern in more depth (how to fix candle tunneling).
Soot on the jar needs cleanup, not guesswork
If the glass is already sooted, wipe it with a soft dry cloth before the next burn. Don't use a wet one on a warm vessel, and don't assume a longer burn will magically fix the residue. The safer sequence is clean the jar, trim the wick, then relight. A simple black unscented option like Black unscented Candle Sand 1Kg / 2.20lbs fits that kind of low-friction maintenance well, because the format is meant to be refreshed rather than fussed over. The black shade is described as bold and modern, and the unscented format keeps the focus on the flame itself.

Trimming Wicks in Candle Sand the Easy Way
Candle sand changes the routine in a good way. The wick sits in fine, plant-based powder instead of solid wax, so there's no hard surface to fight, and the wick can be reset fast once the candle has cooled. That makes the whole process feel less like maintenance and more like a refillable ritual.
The sequence is simple. Let the flame go out, wait a few minutes for the sand to cool, lift out the used wick with the easy-clean wick system, smooth the surface, and drop in a fresh wick. Because the sand is silky and even, described by The Candledust as #Perfect pearl, the wick stands upright without much effort and lights cleanly on the next burn. The practical benefit is obvious, no scrubbing, no scraping, and no hot wax to dodge.
The format also suits people who hate the usual wick cleanup. Mushrooming is less of a problem in this setup, and the refillable powder means the candle can be renewed instead of treated like a one-way object. That's the core appeal of candle sand, especially in a modern, unscented format like the black refill blend, it gives you a clean surface, a reusable wick, and a lighter cleanup loop. It's also why the ritual feels easy to keep, even for someone who's never handled wick trimming before.
A short visual reference helps here.

Your Pre-Burn Wick Checklist
A good candle ritual takes under a minute. Check that the wick is straight, trimmed to about 1/4 inch for cotton or 1/8 inch for wood, the candle is on a heat-safe surface, the room isn't drafty, and the first burn has enough time to melt evenly across the top. If you're using sand candle formats, the reset is even faster because the material cools quickly and the wick is easy to refresh. For a related burn-life habit, the company's guidance on keeping candles going longer sits here, how to make candles last longer.
Trim before every burn, never after the flame starts misbehaving.
| Candle type | Trim length | Sign the wick is overdue |
|---|---|---|
| Cotton jar candle | About 1/4 inch | Smoke, soot, leaning flame |
| Wood wick | About 1/8 inch | Excess crackling, tall flame, black char line |
| Multi-wick container | Each wick individually | One wick towers above the others |
| Candle sand | Short, clean, and upright | Uneven ignition or a tired-looking wick |
Skipping the trim always costs you later, in soot, wasted wax, and a candle that burns out early. The easier the format is to refresh, the more likely you are to keep the habit, and that's where candle sand makes the routine feel natural instead of fussy.
If you want a cleaner, lower-mess way to keep your candle ritual consistent, explore The Candledust. Their candle sand format is built around easy wick refreshes, reusable refills, and a burn style that makes this whole habit simpler to keep night after night.